
Working with Views
We will call Kst objects which are painted onto the screen “View Objects”. These include windows, annotations, plots, curves, and images. A diagram of the relationship between these objects is displayed below:
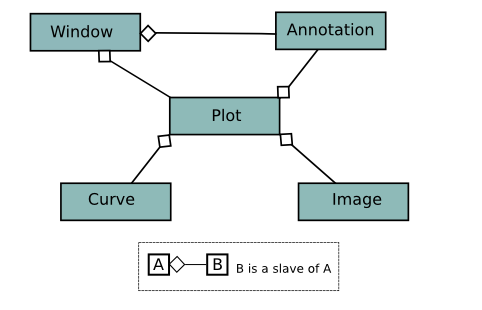
As can be seen from the diagram, the most fundamental views are windows, which act as containers for plots and annotation objects. Plots, however, are the most important view objects of Kst as they perform its chief function of displaying data.
Annotations are objects like labels, arrows, etc. which can be used to display information about plots, or highlight areas of interest. The annotation objects currently implemented in Kst are Labels, Boxes, Ellipses, Lines, Arrows, Pictures and Legends. They are very useful when preparing plots for presentation or publication.
Instances of the various view objects in Kst are hierarchically grouped - annotations, for example, are often deemed “children” of a specific plot based on their location. Moving and resizing a plot then resizes the annotation also. A good way to work directly with the view object hierarchy is to use the View Manager. It can be accessed by selecting ->.
All view objects can be created by selecting their corresponding draw tools. You can edit their options by double clicking on them in Layout mode.
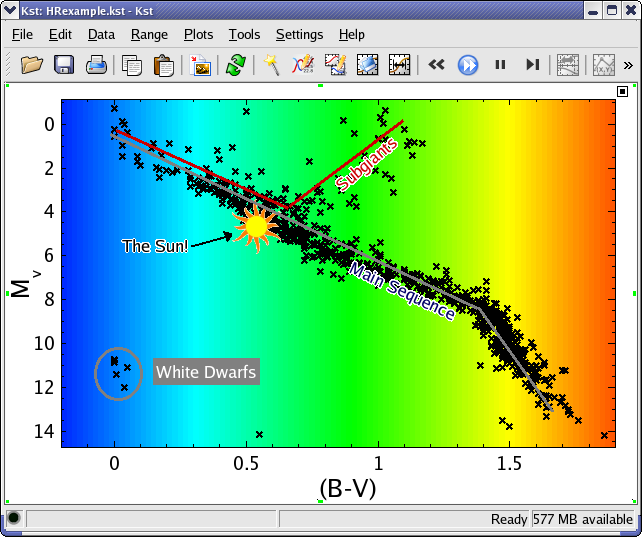
Here is a sample use of view objects in Kst, where we have used a Plot, Labels, Arrows, Lines, and a transparent PNG Picture to mark up an astronomical “color magnitude diagram”.
The View Manager is a tree list view which allows you to copy and delete view objects. It also allows you to access their edit dialogs.
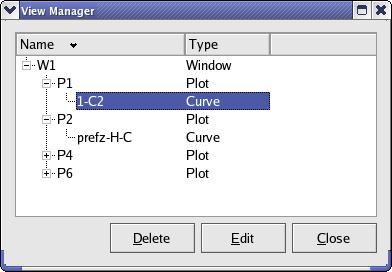
Edit/Delete View Object: Select a view object (window, plot, curve, etc.) to edit and click the button, or right click on the view object's entry and select the option in the context menu which appears.
Copy view objects: Select the view object which you would like to copy and click-drag it over the name of the parent which you would like to copy it into.
The view manager can be accessed by clicking
![]() on the toolbar.
on the toolbar.
When working with plots and other view objects, right-clicking will bring up a context menu which provides commonly used functions. In general, the context menu which is presented depends on which mouse mode you are in and which object you are centered on, but there are four basic options common to all view objects. The title of the context menu which appears gives the name of the view object which you have clicked on.
Brings up the edit dialog for the underlying view object. See the View Object Types sections for more information on these settings.
Deletes the view object.
Presents a dialog to modify the unique name assigned to the view object.
Arranges the plots in the current window in a tile type pattern, with no overlap between plots. Selecting from this sub-menu rearranges the plots according to an aesthetically pleasing algorithm. Selecting the option allows you to manually specify how many columns to tile the plots into. This action applies to all plots in the current window.
There are additional context menu options specific to the Zoom mouse modes and the Data Layout mode.
Kst has various mode choices. Each mode has it own specific usages. The following are available modes in Kst:
The primary usage of mouse zoom modes is to access various zooming functions provided in the context menu. See the section: Zoom Mode Context Menu for detail. There are three mouse zoom modes available in Kst.
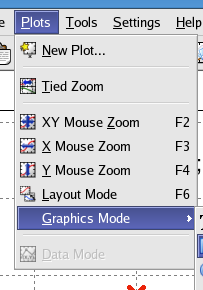
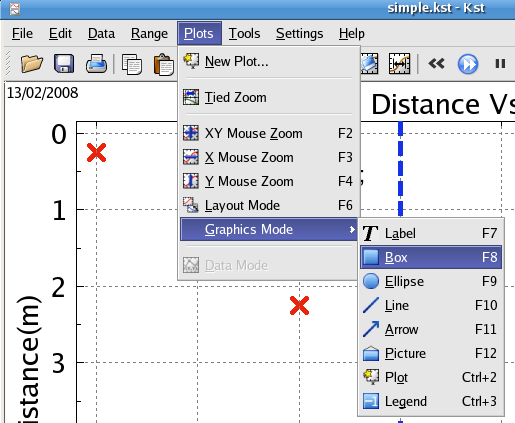
Graphics Mode is used to insert various view objects including all of the annotation objects, plots and legends. To enable graphics mode, choose the object you want to insert from the menu in the menu. See the image below.
Layout Mode is chosen whenever you want to change the size of or move an object. See Moving and Resizing View Objects.
You can also change the layer of an object or group multiple objects together through the context menu under layout mode. See the Layout Mode Context Menu for detail.
Data Mode has already been introduced in Chapter 3. See details in the corresponding section. Note that data mode can only be enabled when Kst is in one of the mouse zoom modes.
The rightmost icon in the toolbar indicates which mode the current Kst session is in. To quickly switch to another mode, click on that icon; the menu below will appear, and you can choose the mode you want.
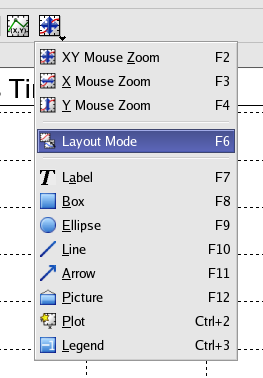
In the above example, Kst is in XY Mouse Zoom mode, and it is going to change into Layout Mode.


Would you like to make a comment or contribute an update to this page?
Send feedback to the KDE Docs Team